
If you want to learn how to install Google Tag Manager for WordPress, then you are in the right place.
This tutorial is going to show you the easiest, quickest way to do it.
If you already know what Google Tag Manager is and you’ve already got an account created, you can jump directly to installing it in WordPress.
1. What is Google Tag Manager?
Firstly, maybe some of you don’t know exactly what Google Tag Manager (GTM) is, so let me quickly explain it.
Very often websites need to add multiple tracking codes for various analytics and ad platforms such as: Facebook Ads, Google Ads, Microsoft Ads, Pinterest Ads, Google Analytics, etc.
Managing so many scripts individually can be time-consuming and a logistical nightmare. Furthermore, adding each of them individually on your website with different plugins will also slow down your website.
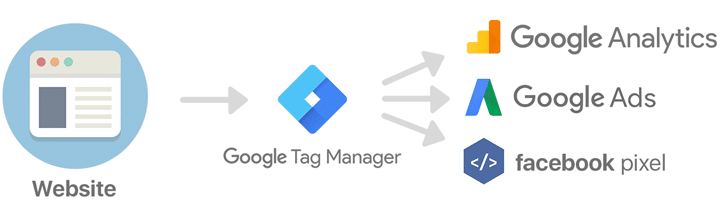
Google Tag Manager solves both of these issues. With it, you can easily add and manage all of these scripts in a single user-friendly dashboard.
Each script will be set up in a tag, therefore the name Google Tag Manager, since it’s a place to manage all your tags.
2. Setting Up Google Tag Manager
Now that you know what it is and how it can help you, let me show you how to create your Google Tag Manager account.
Visit Google Tag Manager and create an account. Preferably this should be with the same Google account that you’re running Google Analytics on.
After loging in, you will be taken to this page:
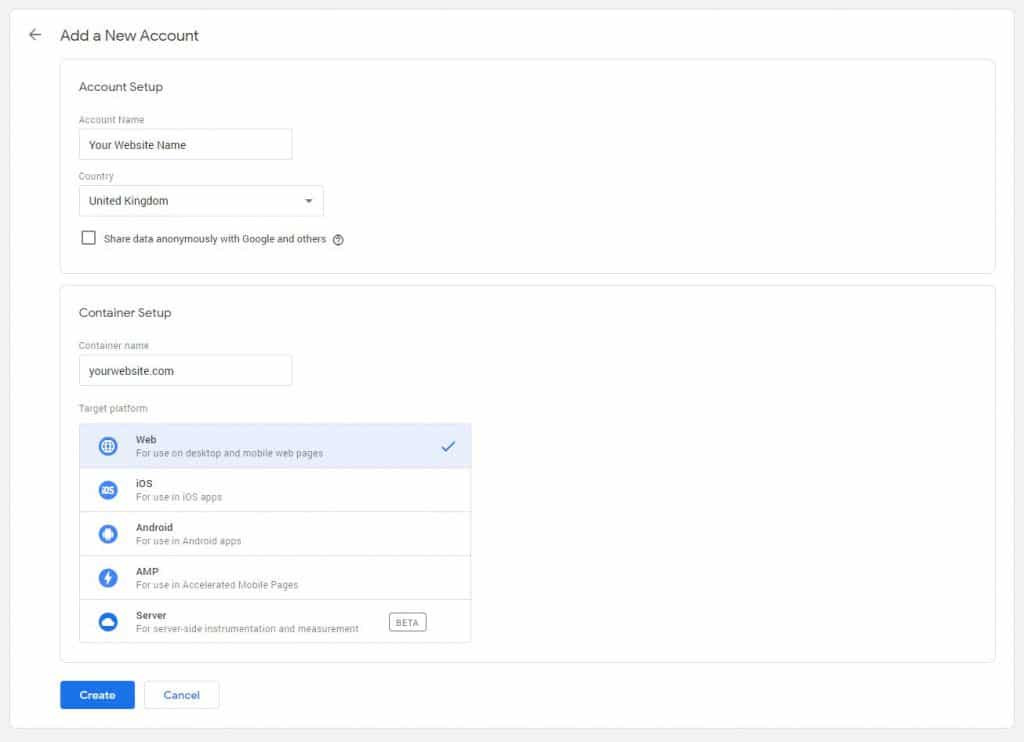
Here you will add your Account Name, which will usually be the name of your website, your Container name, which will be your website and for Target platform you will select Web.
Once done, just click the blue Create button and your Tag Manager account will be ready to use.
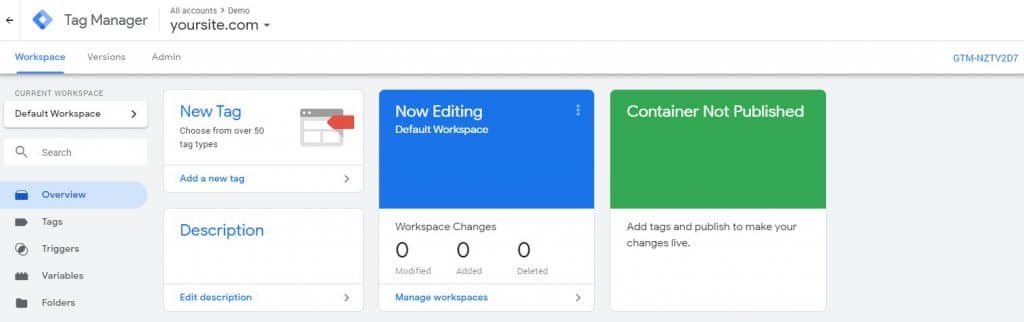
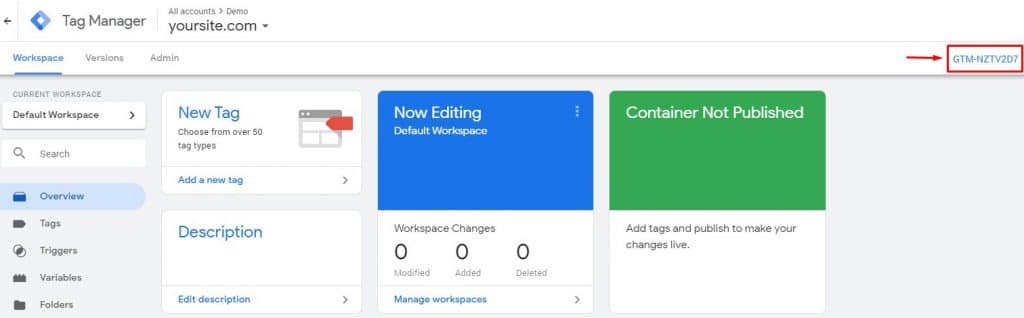
Your Workspace page should look like this.
Next, I will teach you how to install Google Tag Manager in WordPress.
3. Install Google Tag Manager for WordPress
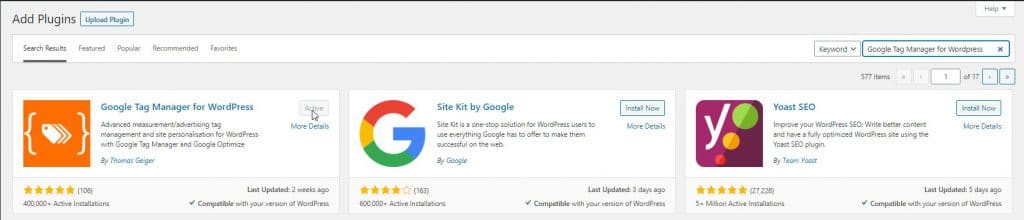
The easiest way to install Google Tag Manager on your WordPress site is with the completely free Google Tag Manager for WordPress plugin, by Thomas Geiger.
Firstly, please install the plugin by going to Plugins → Add New and searching for “Google Tag Manager for WordPress“. Once found, install it and activate it.
4. Google Tag Manager for WordPress Options
Once installed, we will have to configure your Google Tag Manager for WordPress options.
We will do this by going to Settings → Google Tag Manager. Here you will have to place your Google Tag Manager ID.
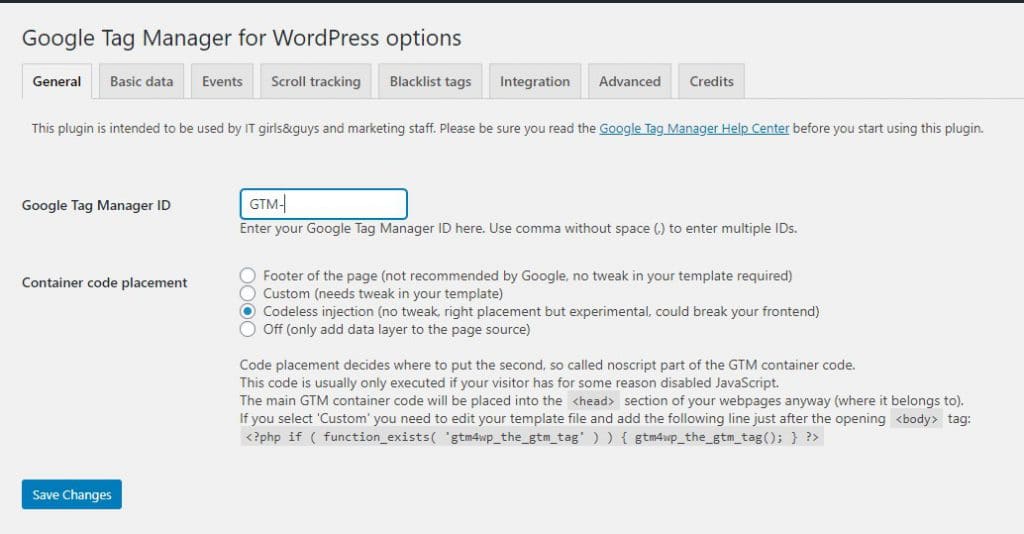
You can easily get your GTM ID by going into your GTM Dashboard and copying it from the top right, as shown below:
As for container code placement, please select codeless injection. This has worked great for me on many sites, without any problems.
After doing this we will go to the Integration tab → WooCommerce. Here you need to make sure you’ve got the following checked: Track enhanced e-commerce, Cart content in data layer & Order data in data layer.
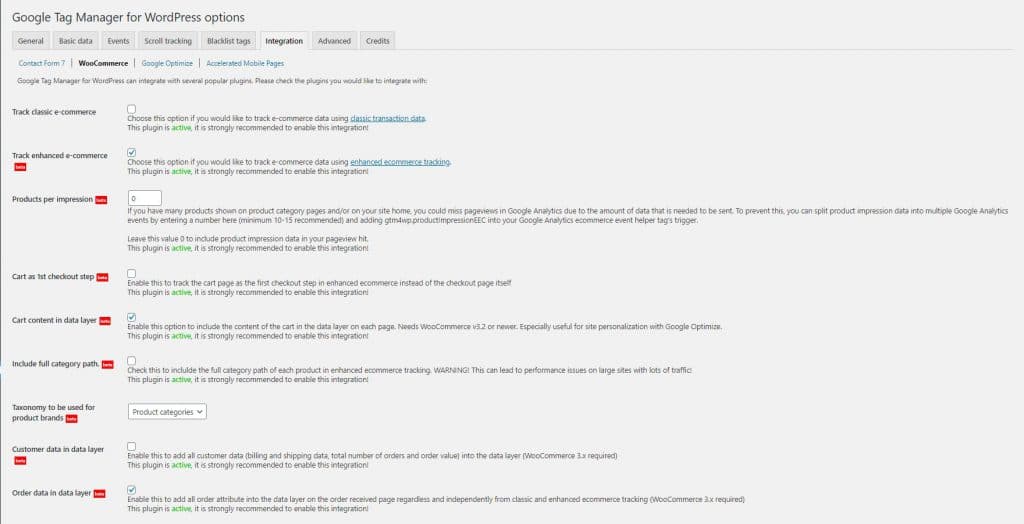
These options will make sure that eCommerce events are correctly tracked in GTM with Google Analytics and Facebook Pixel.
5. More Reading
If you haven’t configured GTM to properly track eCommerce events in Google Analytics or Facebook Pixel, then you might want to follow these tutorials: